
Having to manage a support team and a huge number of customers is a task already daunting by itself. On top of that, add the need to keep track of who did what and when and you will be quickly facing a continuous jump from one tool to another that can easily slow all your process to a crawl. That’s why we are talking your about Microsoft Teams Chatbot. Because your customers and contacts are in one spot. Your tickets and contracts are somewhere else. All your team is (luckily!) on Microsoft Teams.
When a new employee comes in, you have to share access or create new users on the various tools. On top of that, training needs to be done for those tools and more time is lost.
Does this sounds familiar?
What if we could have someone else take care of all this? Even better: what if we could have a bot take care of all this?
Getting Everything Ready
The first thing we need to do for our example is to setup everything we need:
- A Xenioo account for building our chatbot (of course!)
- A powerful CRM that has clear and easy integration docs.
We picked HubSpot for this as its both powerful and price friendly. - One or more Microsoft Teams accounts and at least one desktop installation.
(and yes, you could easily use our example on pretty much any other Xenioo publishing channel)
Once you’re set with your accounts, its time to start our journey!

Building The Bot AI
We want our chatbot to be usable from anyone without any specific training and for this, we need it to be able to answer to standard free text questions like “Do we know Mary White?” or “Who is Mary White” and so on.
To do so we are using Xenioo native AI engine and add a good number of question variations.
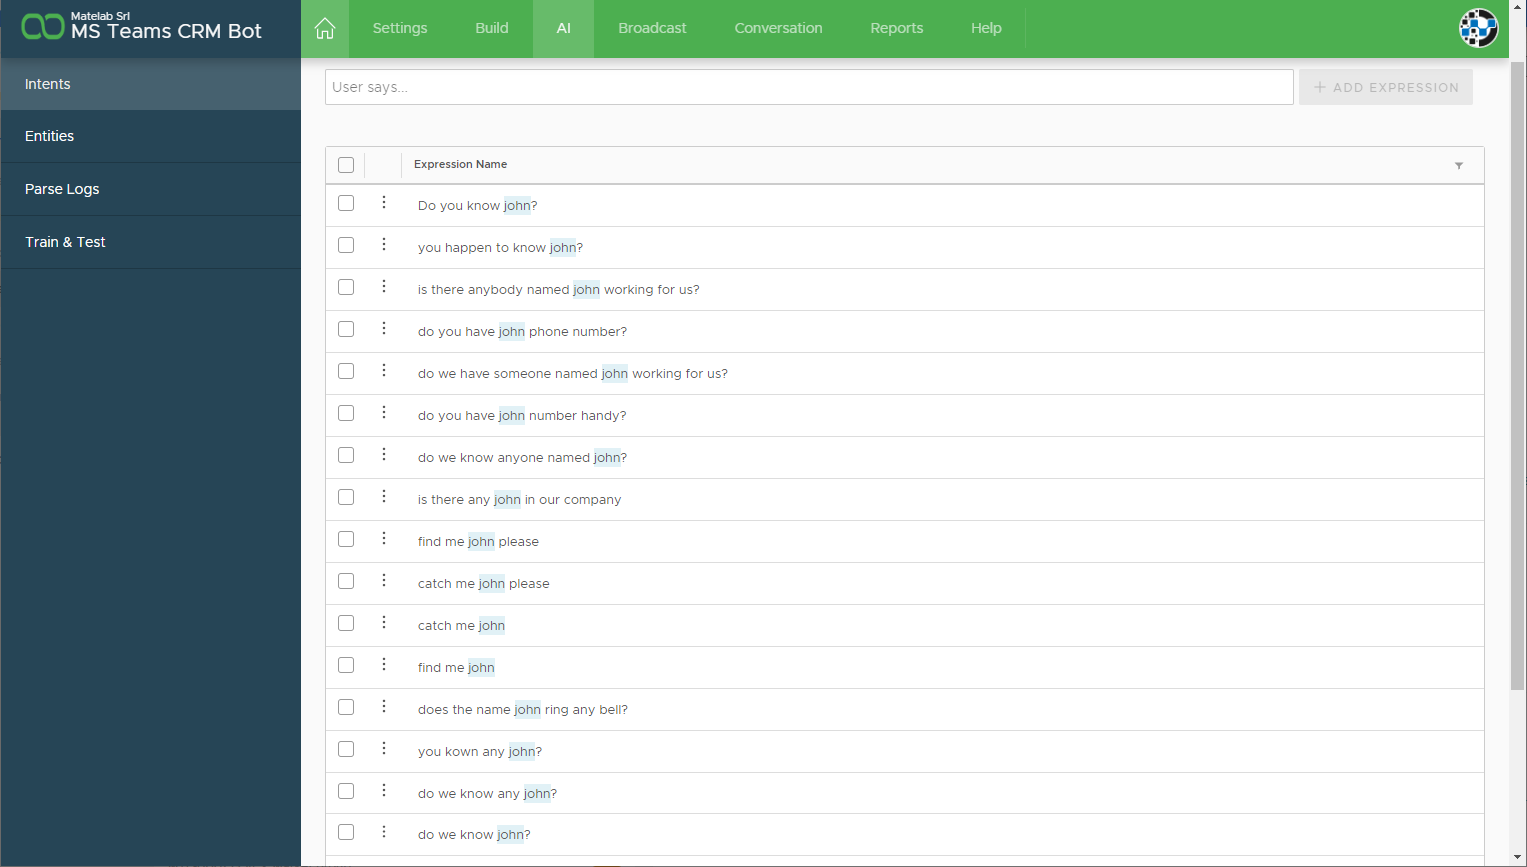
The AI Engine interface is very straightforward and setting all of our expressions is very fast. Also, thanks to inline entities creation, we can just click on our person name and identify that as a person_name entity to be used later.
Once we’re happy with all our expressions, we can check the training right away by moving to the Train & Test section.
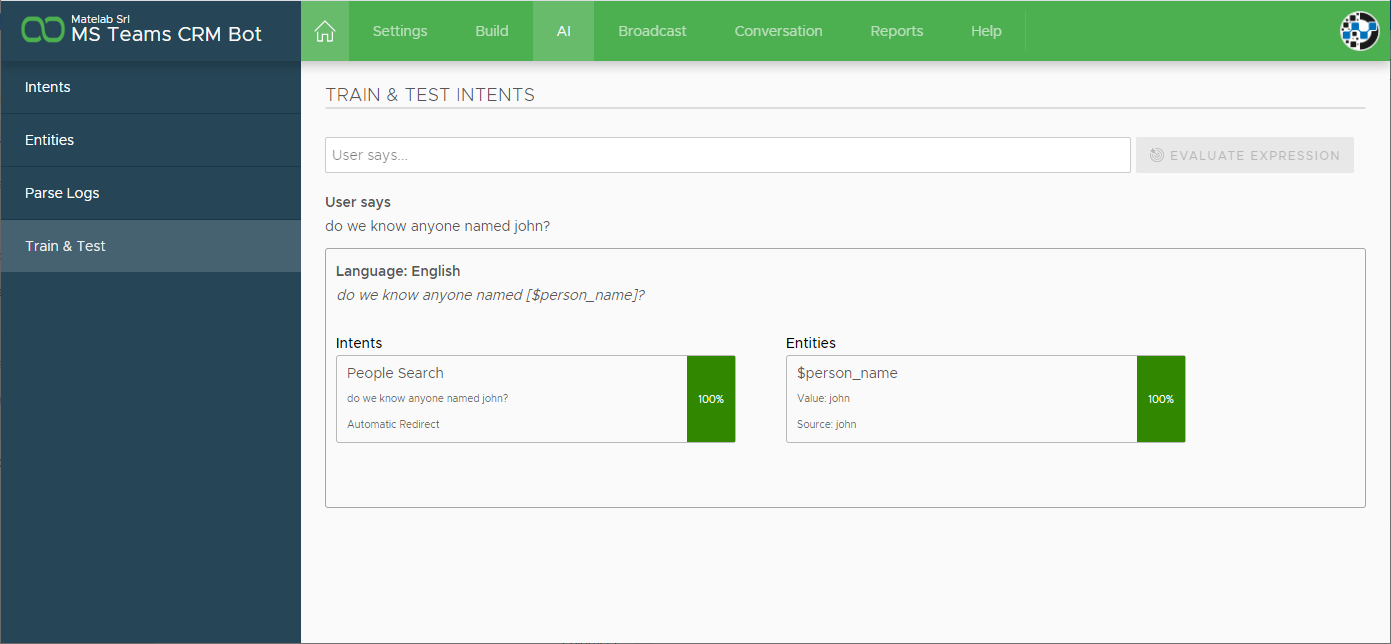
Great. Xenioo AI engine is quickly trained and inside our sentence, a person’s name is recognized. But our person_name entity was trained on a single name: john.
Let’s try changing it…”do we know anyone named Mary?“
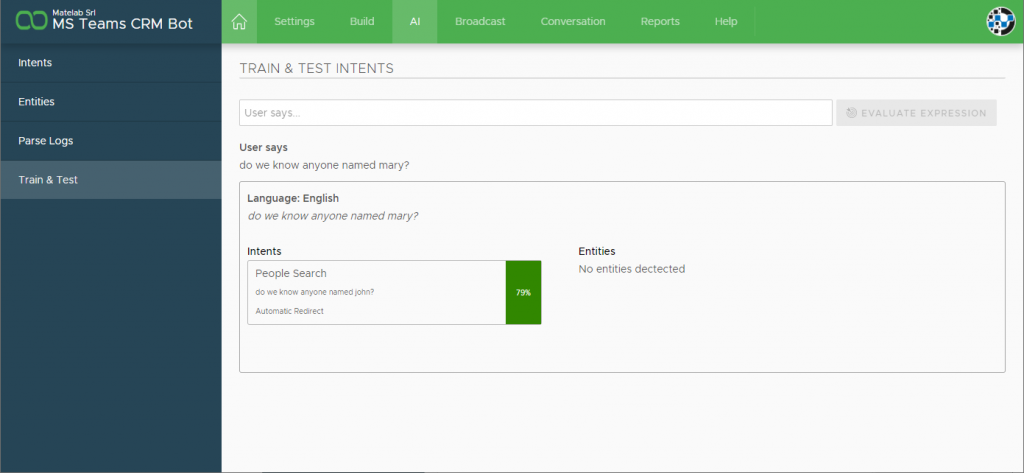
Whoops. No person_name detected and lower match. Why? Because by default, Xenioo entities lookup for an (almost) precise match between the source entity and the user input text, and in our case, all Xenioo knows is john.
A way of solving our problem would be to add each and every possible name as a variation of our entity. We could reach a much bigger number of variations but still not all possible names. Also, our users may search for a company or a partial email.
How can we make Xenioo extract the data we want but just accept any text?
The answer is Wildcard Entities. These special entities will precisely extract any text outside of the fixed expression words and automatically assign it to the entity variable.
Let’s change our entity to a wildcard and try again with a random name.
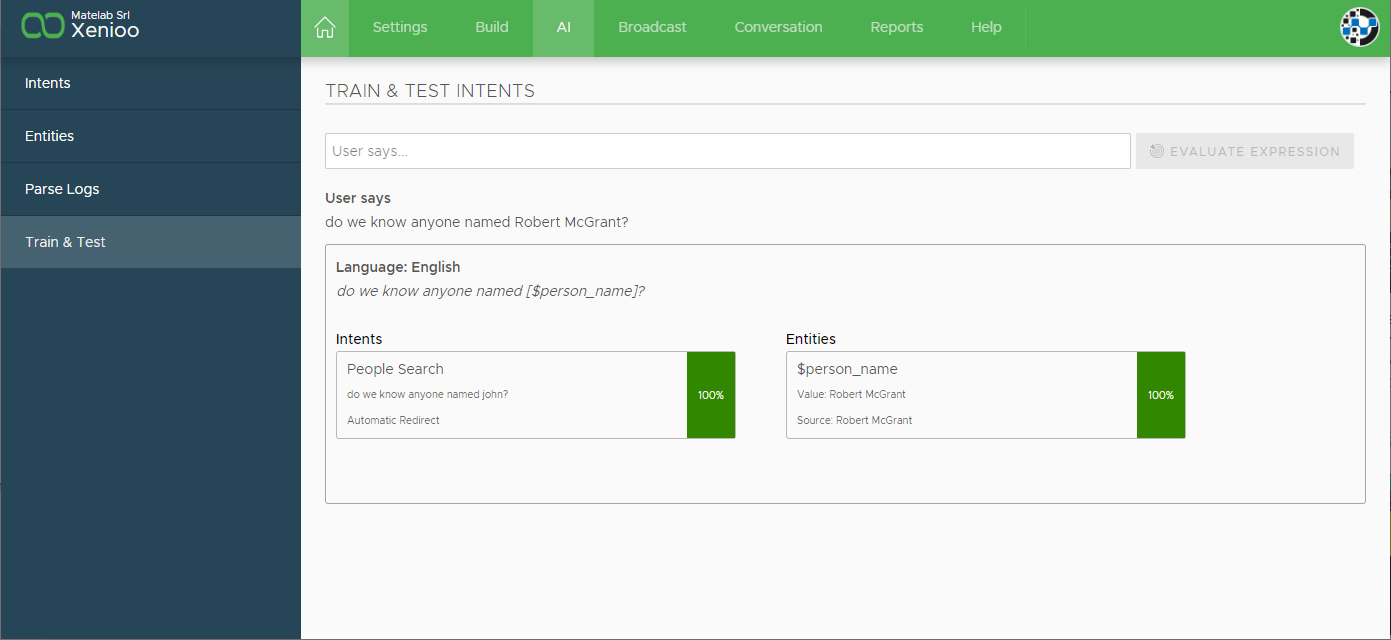
Perfect. Now we can just use any name in any expression and whatever we write it will be passed directly to our variable.
We will use the person_name variable to do an API lookup on our HubSpot contacts list.
Designing The Flow of your Microsoft Teams Chatbot
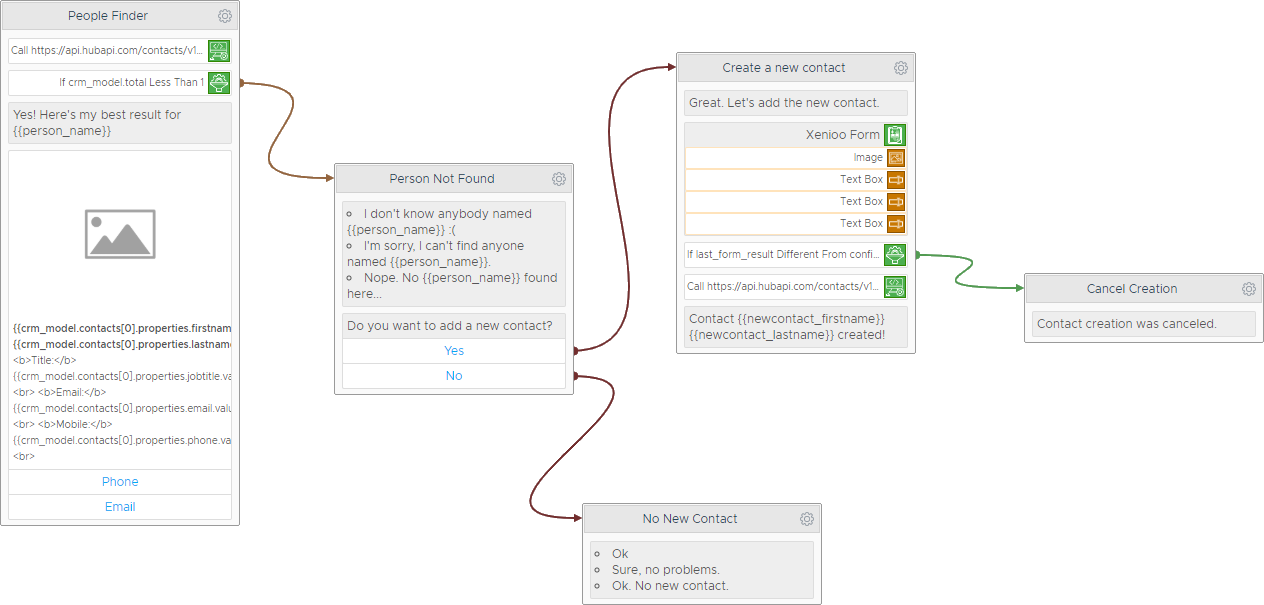
The flow is very simple here: our search intent will trigger a search on HubSpot.
We need to look if at least one contact is found, we will display a card with a photo and some details. If no contact is found, our bot will ask if we want to create a brand new contact.
If our user chooses so, instead of redirecting to HubSpot, we will display a custom Xenioo Form with all the basic fields our company requires, and then we will create the contact directly on HubSpot.
Thanks to Xenioo preview capabilities we can test our bot right away and see if it meets our requirements. Once we’re happy with how it behaves its time to setup our Microsoft Teams Chatbot integration.
Creating a Microsoft Teams Chatbot
With our flow ended, we have our bot ready for prime time. Let’s click on the publish button and on the Microsoft Teams icon. The Microsoft Teams Chatbot publishing dialog will appear.
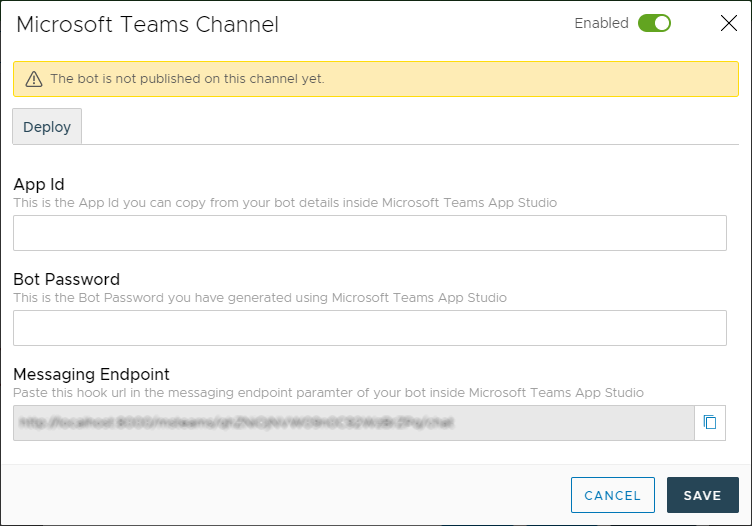
We miss some information that only Teams can give us but for now, let’s take note of the Messaging Endpoint that Xenioo just created: we will need it in a couple minutes.
Microsoft Teams bots are basically applications defined by a ‘manifest’. A bot manifest is a small file containing all of the basic information about our bot like its name, icon, or permissions.
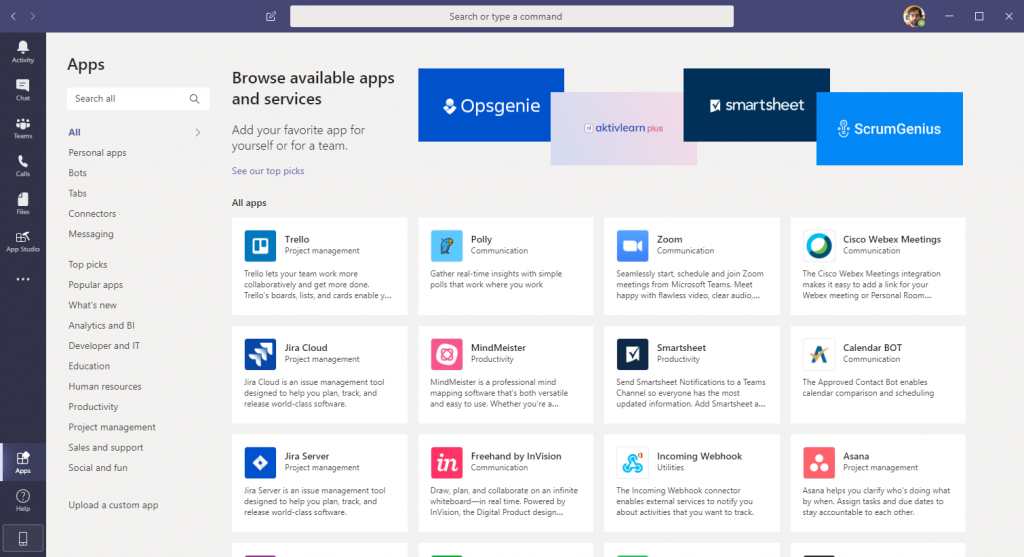
To create a new manifest for our bot, we need first to install a Teams App called App Studio. To do so, just click on the Apps icon on your Teams Desktop interface and click on the App Studio box. If the box is not visible a quick search should highlight it.
After App Studio is installed you’ll find its icon on the left bar or under the three dots at the bottom of it. Click on the icon and then select “Manifest Editor”. That’s what we need as we’re creating a brand new Teams Application.
App Studio will display a number of descriptive fields detailing your new Application. Feel free to fill them as you please as they are pretty much all descriptive.
What we’re looking for is the Bots section, under capabilities. From there, just click on the single “Set up” button you will see.
Name your bot as you like but just make sure to specify that your bot can upload and download files if you wish to exchange files with it.
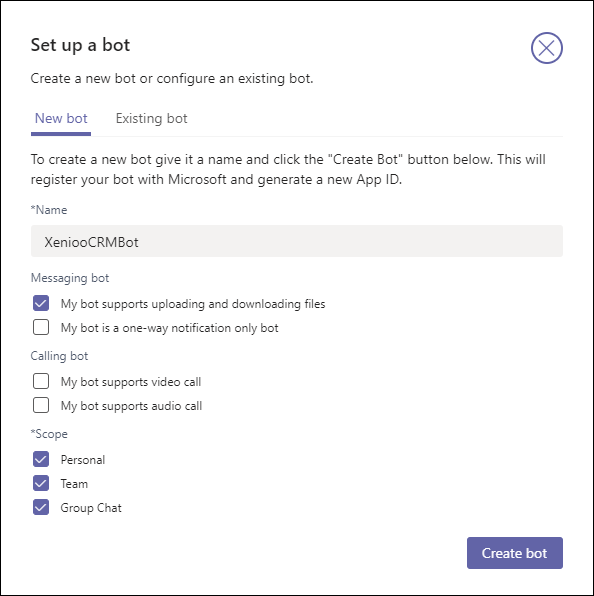
Click on “Create bot” to create your bot. After a short while, your bot page will change with your bot details. Copy the bot id in the Bot Id field in the Xenioo publish dialog.
All we’re missing now is a password for our bot: click on “Generate new password” to have Microsoft Teams create one for you. Copy the password and paste it in the Bot Password field shown in Xenioo.
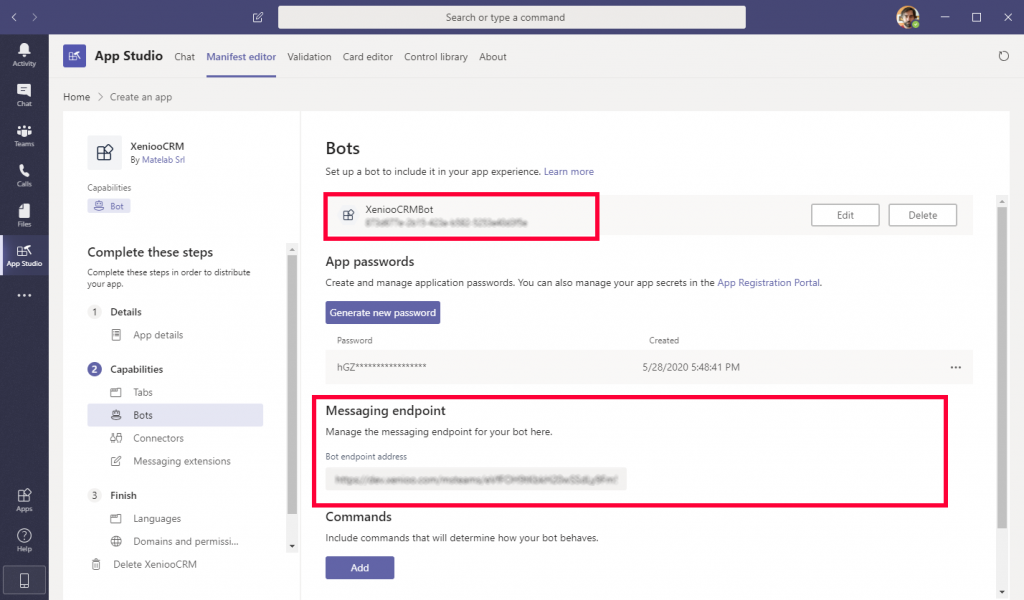
Last, but not least, copy the Xenioo webhook endpoint from the Xenioo publish dialog inside the Messaging Endpoint field. You should see a green icon appear right next to the field when the connection is done.
Make sure that everything is saved and move to the last option at the bottom: Test and distribute.
From this page, you can choose to install this app on your Teams account or download it to give it to another team (yes, you could actually create general-purpose bots that are used from multiple teams!).
If your account has the required permissions you can proceed to install your new app directly by clicking on install.
If you don’t, you can just download the app manifest and move back to the Apps section where you can upload it using the “Upload a custom app” menu at the bottom.
Whatever you choose, after a couple of seconds you’ll find your new app listed among the available apps. From there just click it and add Microsoft Teams Chatbot to your channel.
Now confirm your Xenioo publish page and it’s done! Our chatbot is online and connected.
Time For A Test Run
A simple hello from us will display a random fallback phrase confirming that everything is fine and connected (and that we need to teach our bot some chit-chat skills!).
We can now chat with it directly, in a one-to-one chat or we can invite it to one of our channels: once invited our bot can be invoked by just a standard message mention.
Let’s see how it could work in a day to day channel chat.

Our bot stays in the channels we want and its ready to reply to anyone as soon as its mentioned.
Our CRM with contacts and leads is now available to anyone in the channel without any special training and accounts.
Wrap Up
Microsoft Teams Chatbot is a great addition to any channel being the tools you invoke anytime you need some specific information.
There’s a number of useful ideas bouncing around right now from business trip weather advisor to conversational billable hours filler (“Hey @Bot, I’ve just worked 2 hours for Customer X”…wouldn’t that be great?).
What about you? Ready to shape your ideas and improve your Teams experience? Join Xenioo and let us know!