
A little less than a couple of months ago, we released a brand new Xenioo channel enabling Alexa publishing. Today we’re thrilled to update our channel offer with yet another voice platform: Google Assistant! In this post we’re going to explore how the multi-channel approach of Xenioo works and how you can publish your chatbot as a Google Assistant Action.
First things first: Assistant Actions
What you need to start testing your Assistant Action is, of course, a Xenioo account and a dedicated Google Actions developer account. Getting the first is easy enough and you can just signup to the second using your google account. Once you’ve signed up to your Google Actions developer account, click on Go To Actions Console to check your current actions dashboard.

Since your dashboard is very empty right now, let’s go ahead and click on Add/Import project to create our first action. Give your project a name you like and click on “Create Project”.
After a short while, your project workspace is created and you will be presented by a number of action templates you can use. Since we’re going to do everything using Xenioo we can just scroll down and select “Actions SDK” and confirm.
What we are doing is basically saying that we do not need anything pre-built as all actions and interactions are going to be handled externally.
We have finished for now here. Time to go and create our chatbot!
Creating the Chatbot for your Google Assistant Action
Since Xenioo always works as a multi-platform environment, we can just create a new chatbot and start designing right away. We will decide later on wich platform we will be publishing. In our example we will be going for a simple game action: the chatbot will pick a color and the user will be asked to guess it.
Heading to Xenioo AI section, we can start by creating a new intent, called ‘Guess The Color’ and add there all possible expressions.
We never know how the user will express his guess so try to be as generic as possible while specifying all
As soon as you’re happy with all the expression you can go on and do a quick training and test and verify that all different variations are fine. As everything looks right, you can then link the intent to a specific interaction so that everytime the user tries to guess the color you are in control.
Picking the random color
Xenioo has an incredibly powerful action called Random Split. This action will execute if a random number (generated
Using a couple of these actions can help you create a split A-B test chatbot very easily and balancing more than one can be used to design very complex scenarios. For our example, we are going to use this to generate a pseudo-random situation where Xenioo picks a color to be guessed.
Game Over
To give our chatbot a basic gaming approach we are going to give the user a maximum number of tries. Our user will have a maximum of 3 tries per game to guess our color.
To manage this, we are going to use Xenioo built-in variable operations on a variable of our choice where we will be adding 1 each time the guess is wrong. Once the wrong counter reaches 3, the game is going to end. To keep our user in the loop, we are going to ask every time if he wants to play again.
Publishing to Google Actions
Now that our chatbot is ready we need to head back to our Actions console to retrieve our project id.
To do so, click on the project settings menu inside the “Actions on Google” console and select “Project Settings”.
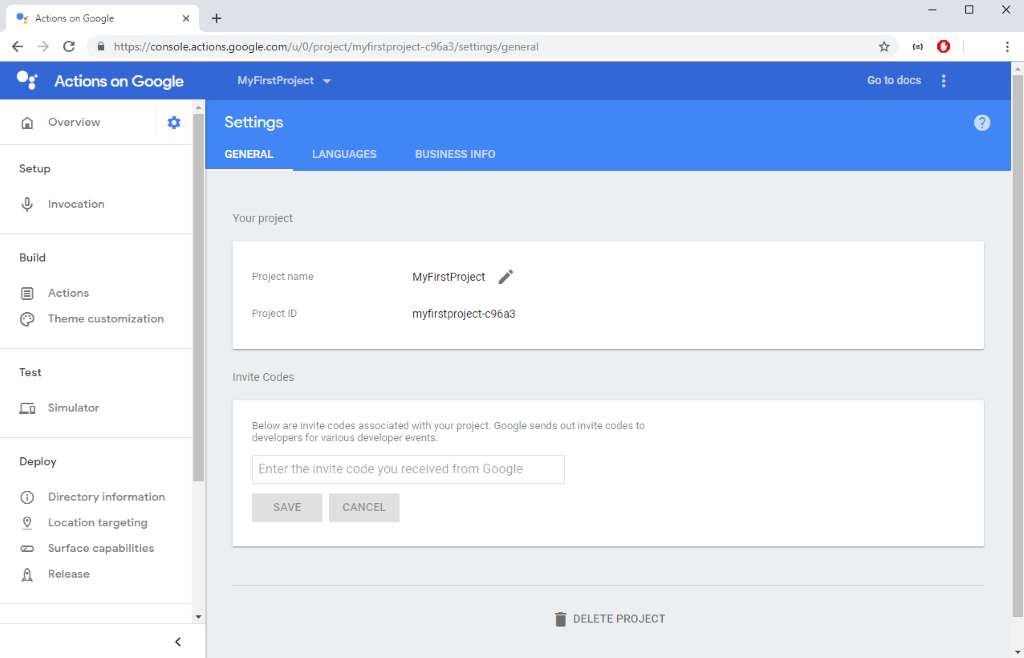
From the page that will appear, copy the Project ID field value and move to Xenioo. Select the publish button and click on the Google Assitant box. Paste the Project ID in the only text box you will see and press Save.
After a short while, Xenioo will ask to open a very
Press Save again when its done the click on “Publish” to bring online your chatbot. You’re now ready to test your brand new Google Action!
Not Just a Google Assistant Action
We said it at the very beginning of our post. Xenioo aims to be not just fully multiplatform but to allow seamless publishing of the same chatbot on all platforms.
Do you want to try this chatbot on WhatsApp? Go ahead and publish it there. Fancy using Alexa? You’re good to go!
Remember: you design once and use it anywhere!
Want to play around with our chatbot example? We’ve created a handy backup of this Xenioo chatbot that you can download and restore to your account. Have fun!