
If you have been using online automation or automatic task design in the last years, you surely know Zapier.
Today we’re going to see how easy it is to integrate Xenioo with Zapier to create real-time data flow and collection.
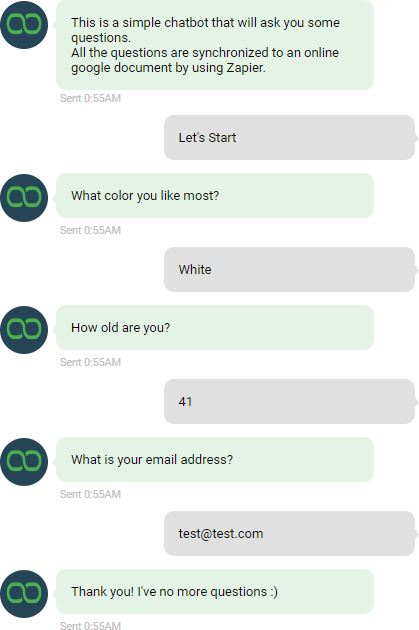
The scenario is quite typical: we are asking our users some very simple questions and we would like to collect all the answers in an external repository.
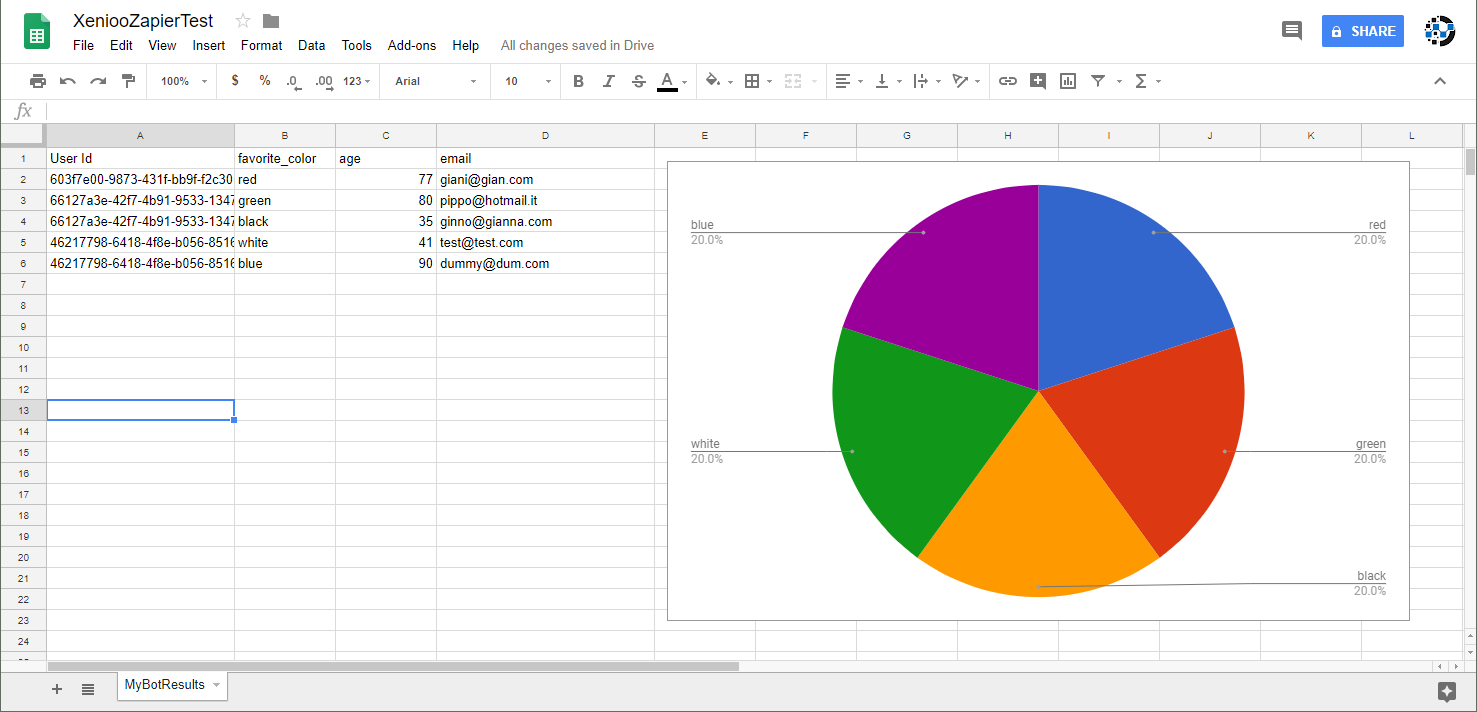
In our example, the repository will be a Google Sheet.
Building our chatbot
To get as fast as possible to Zapier integration, we are building a simple chatbot asking the user the usual questions. We are using a brand new Xenioo Action to further cut some time from design: the Array Of Quick Reply Buttons.
This action will display two or more quick reply buttons and automatically set a variable of your choice with the text of the clicked button. Is very quick and perfect for this kind of chatbot where we want to collect the user answer to multiple options.
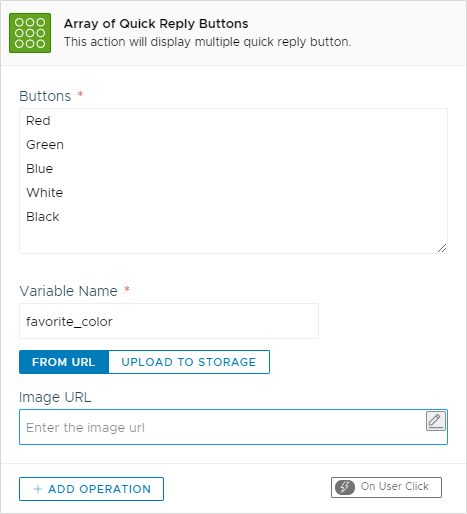
We can laso add an image to each button but let’s skip this step for now. We quickly setup our chat flow connections and our chatbot will look something like the one in the following picture.
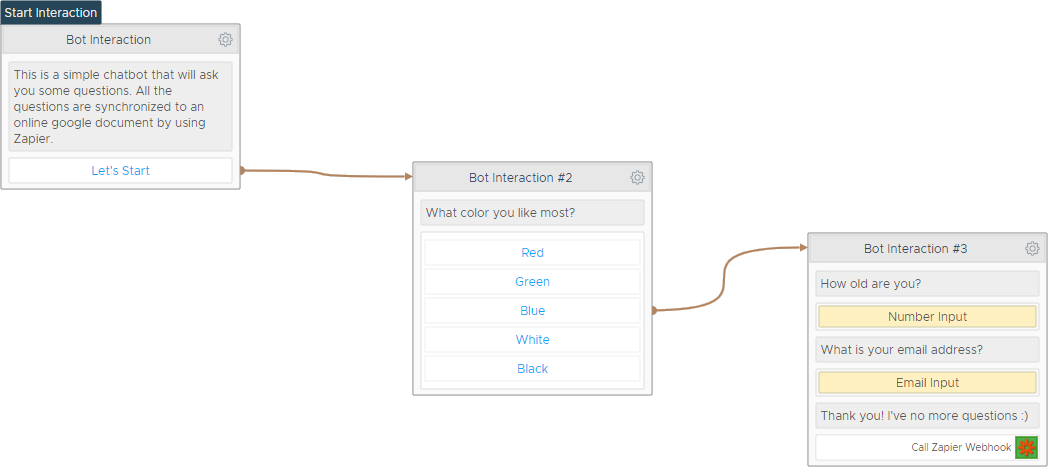
That was easy 😉 At the very end of the
As for every Xenioo component, you can call integrations as an Action or as an Operation: an Action will execute directly during the chat flow while an Operation will execute as a result of an event.
The text display is a typical Action while the GoTo attached to a quick reply button, redirecting the chat flow to another step, is a typical Operation.
The Zapier integration is no different: you can choose to place it as a step of the
Setting up our Zap
Now that our chatbot is ready, it is time to move to Zapier to setup our automated Zap and our connection to google docs. To do so, we are creating a two step Zap: the first step will receive the data sent by Xenioo while the second will populate our google sheet.
To let Xenioo send data to our Zap, we are creating a Webhook step that will wait for incoming POST data.
Xenioo will be pushing data to our Zap and activate it. Zapier will automatically present you with a unique

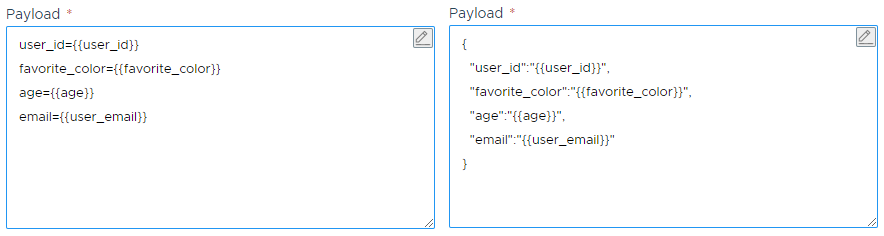
The webhook URL is half of the work: the other half is choosing what data we are going to send. To do this, we can fill the Payload field with all the variables we need.
You can choose between a flat varibale=value list of fields or go for more complex JSON structures: Xenioo can
Once you are happy with your variables configuration, is time to let Zapier know that it can start listening to the webhook.
As you enter the “Test this Step” section of Zapier, you can run you chatbot preview and have Xenioo automatically call the hook for the first time.
This action has two goals: the
Attaching your Google Sheet
Once the webhook step is up and running all we need to do is attach a Google sheet from our Google Docs account.
Follow the Zapier authorization procedure to grant your Zap access to your documents.
For this example, we are choosing an option that creates a new row in an existing sheet. Prepare a new worksheet in your Google Docs account and attach it to the action.
If the previous step has been done correctly, Zapier will automatically present the Xenioo variables specified in the payload and choosing what data goes in what column will be just a matter of a couple of clicks.
If you are adding new variables or changing the payload structure, remember to go back to step one and test again the hook: the Zap fields will update and you won’t lose any configuration you’ve made to other steps.
Once this step is complete, activate your Zap and we can go back to Xenioo and launch a preview of our chatbot.
You can keep your google sheet open: as soon as you finish the chat flow, you’ll see a new row added in real time!…And since you’re at it you can put a nice chart to check the statistics of your survey as soon as they are ready!
Awesome! Now again! blindfolded!
The Xenioo integration with Zapier can work wonders with your chatbot data, your leads and generally with everything that needs some level of advanced automation.
What we’ve seen today just barely scratched the surface of what you can archive with this Xenioo Action and yet, we didn’t stop here.
A one-way integration is surely fine, but what if you could do it both ways? What if a slight change in that Google Sheet could activate a Xenioo Broadcast? Imagine updating your order status sheet and have a broadcast automatically notify your contacts that their order is ready!
Sound nice? Just wait for the next post then!
Want to check out the full example in Xenioo? Click here to download the template that you can restore as a brand new bot in you account.